Jupyter Lab使用
Jupyter Lab使用1、Jupyter Lab安装1.1、Jupyter Lab1.2、Node.js2、Jupyter Lab启动2.1、设置默认浏览器2.2、启动Jupyter Lab2.3、宿主机访问3、Jupyter Lab配置3.1、局域网访问3.1.1、创建配置文件3.1.2、修改配置文件3.2、配置访问密码3.3、开机自启服务3.3.1、编辑服务文件3.3.2、设置自启服务开机自启服务启动服务查看服务状态验证开机自启4、Jupyter Lab使用4.1、内核4.2、运行程序4.2.1、正在运行4.2.2、运行完成
1、Jupyter Lab安装
1.1、Jupyter Lab
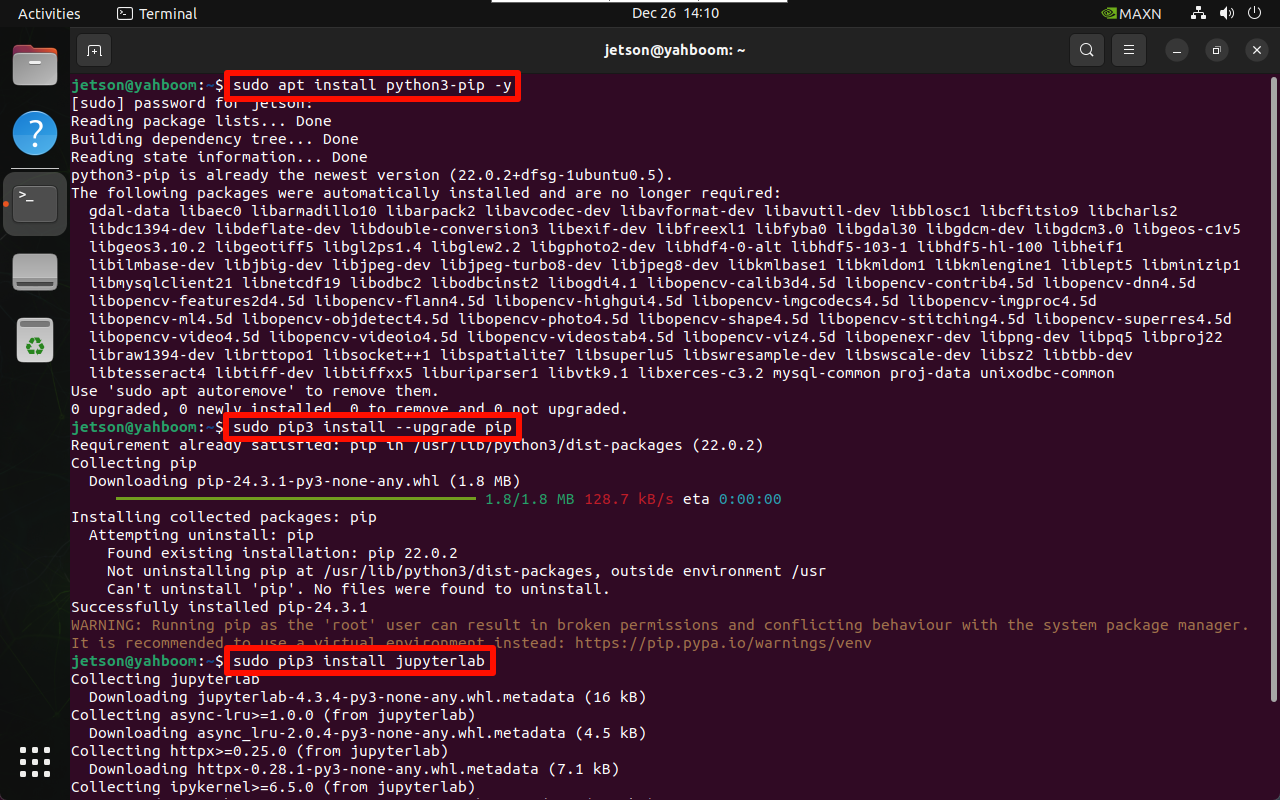
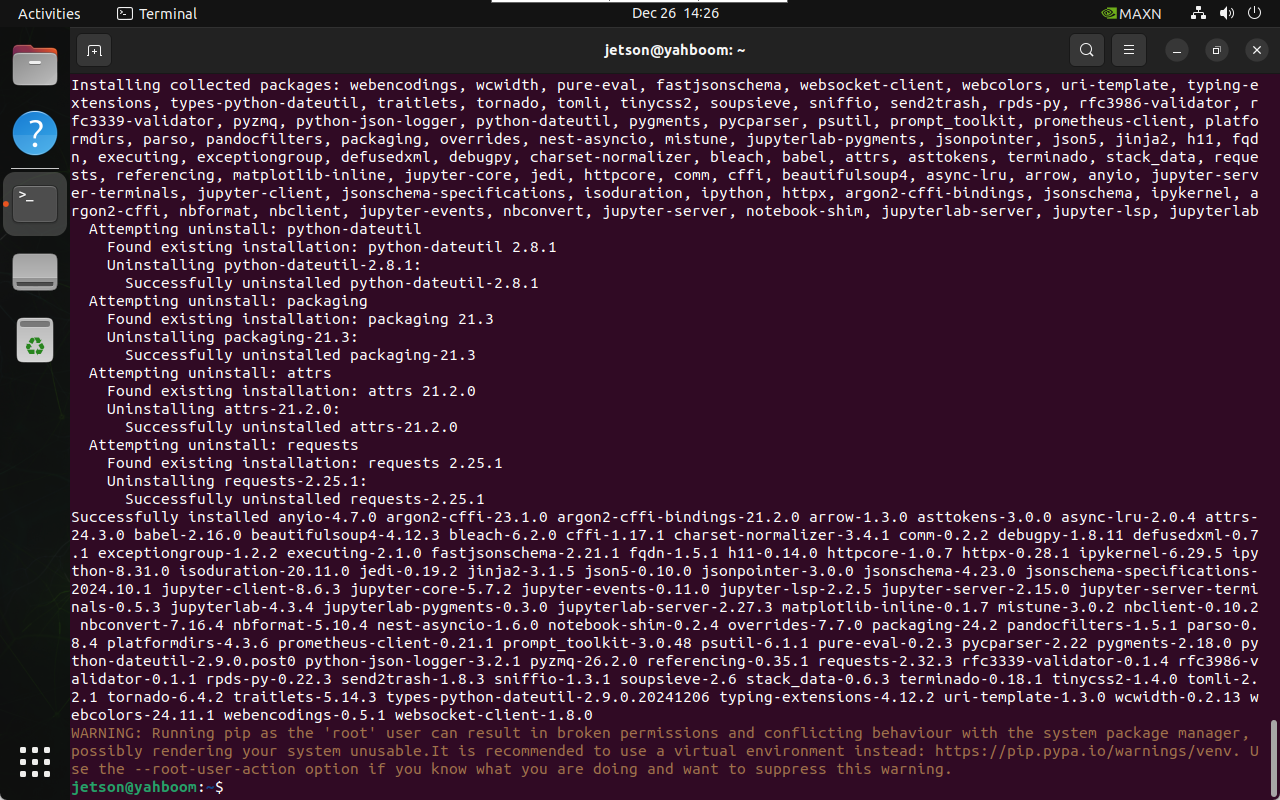
使用下面命令安装Jupyter Lab:若安装Jupyter Lab下载速度较慢,可以使用指定源进行安装
sudo apt update sudo apt install python3-pip -y sudo pip3 install --upgrade pip xxxxxxxxxx sudo pip3 install jupyterlab # 清华源:pip3 install jupyterlab -i https://pypi.tuna.tsinghua.edu.cn/simple # 阿里云源:sudo pip3 install jupyterlab -i https://mirrors.aliyun.com/pypi/simple/
1.2、Node.js
使用下面命令安装最新的Node.js:
xxxxxxxxxx sudo apt install curl -y xxxxxxxxxx sudo curl -fsSL https://deb.nodesource.com/setup_22.x | sudo -E bash - xxxxxxxxxx sudo apt install nodejs -y
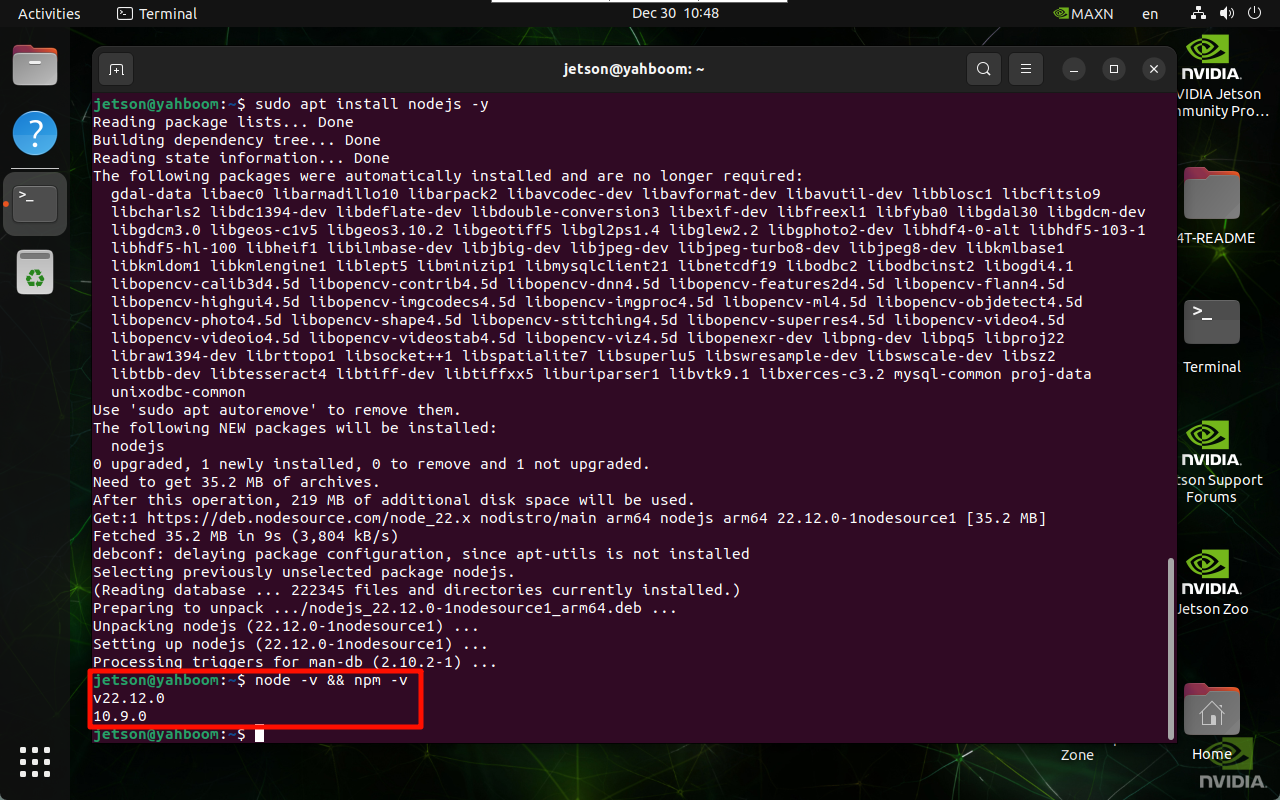
验证版本:
xxxxxxxxxx node -v && npm -v
2、Jupyter Lab启动
启动Jupyter Lab前需要设置系统默认浏览器,不然启动终端会出现一些提示。
2.1、设置默认浏览器
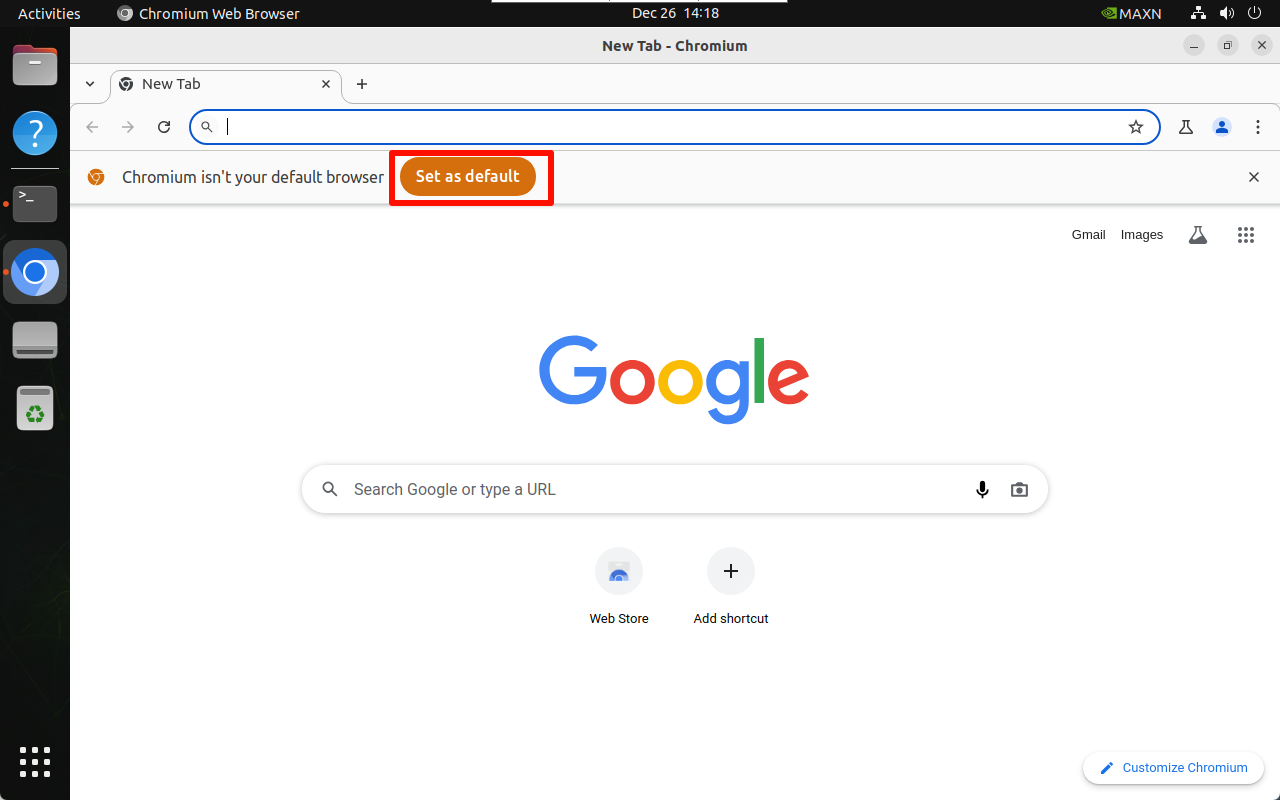
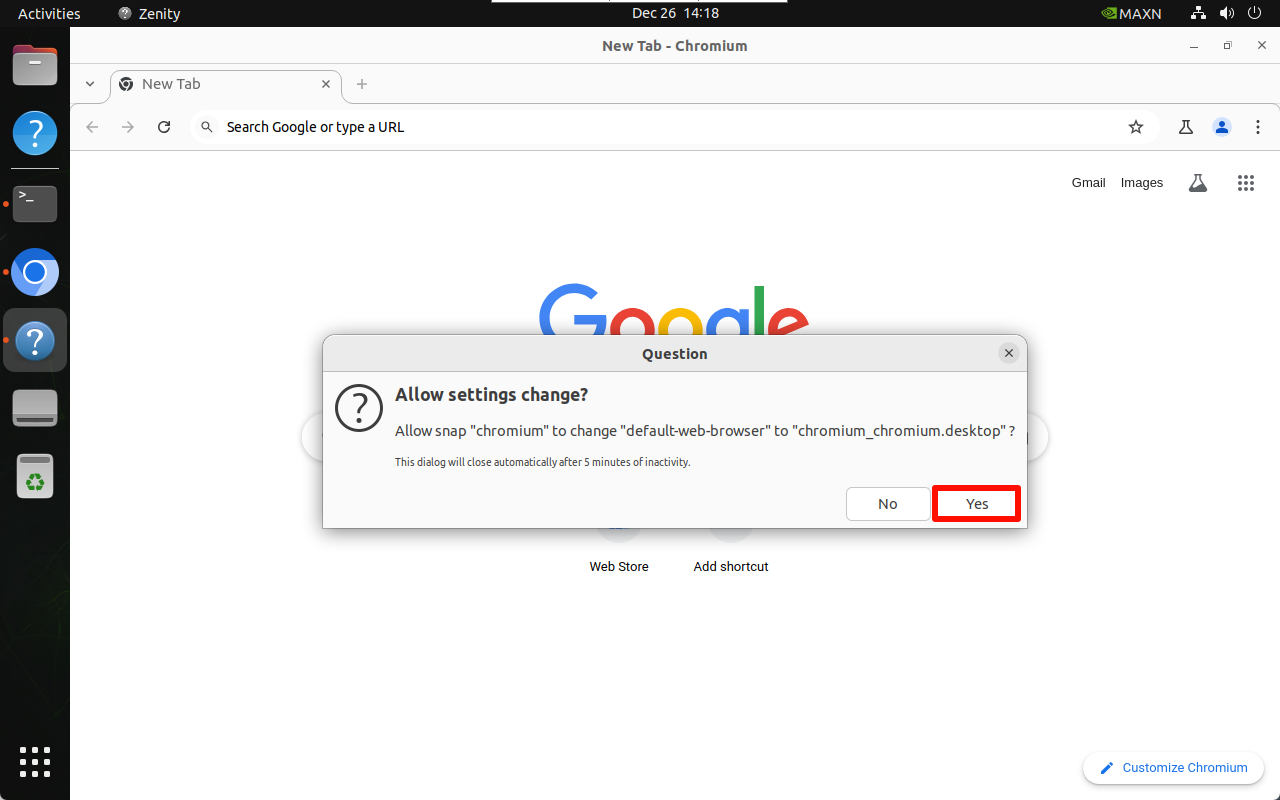
打开系统Chromium浏览器选择设置默认浏览器:
2.2、启动Jupyter Lab
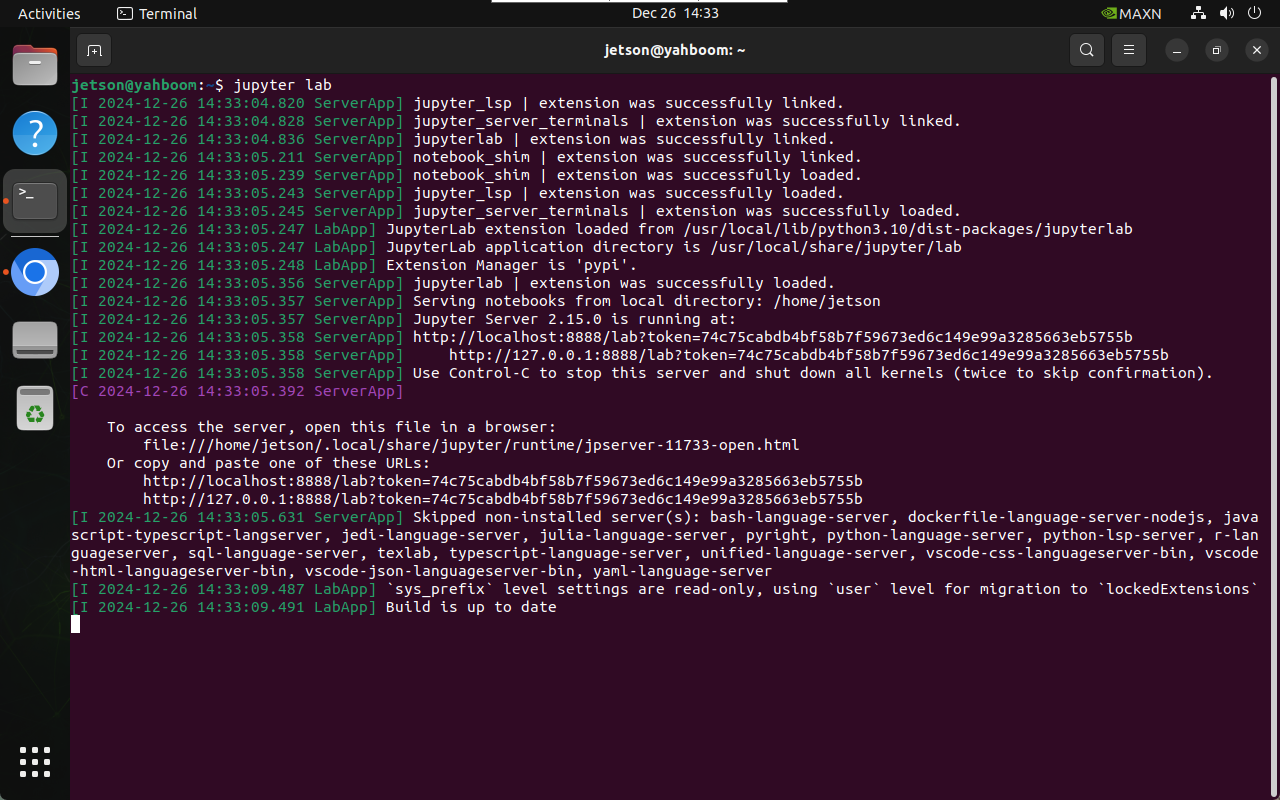
xxxxxxxxxx jupyter lab # 无浏览器启动 jupyter lab --no-browser # 以管理员身份启动 sudo jupyter lab --allow-root
2.3、宿主机访问
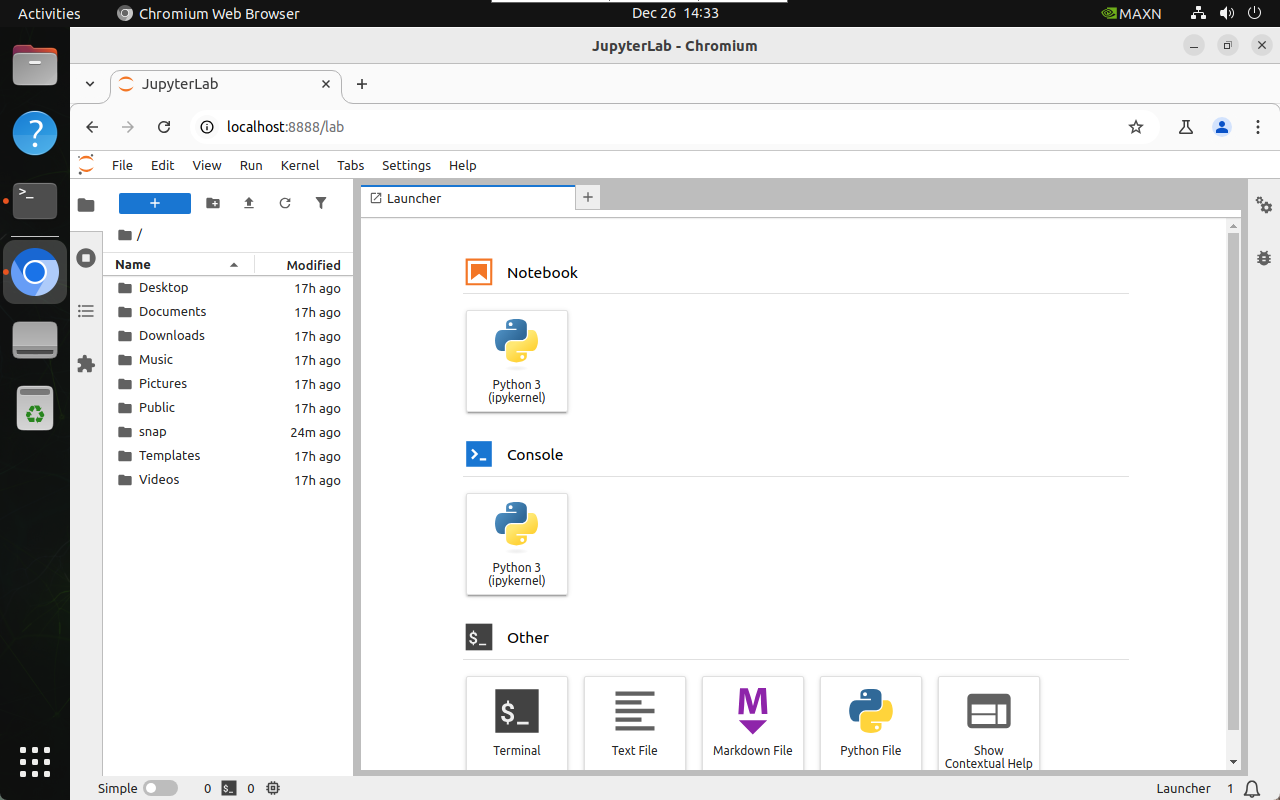
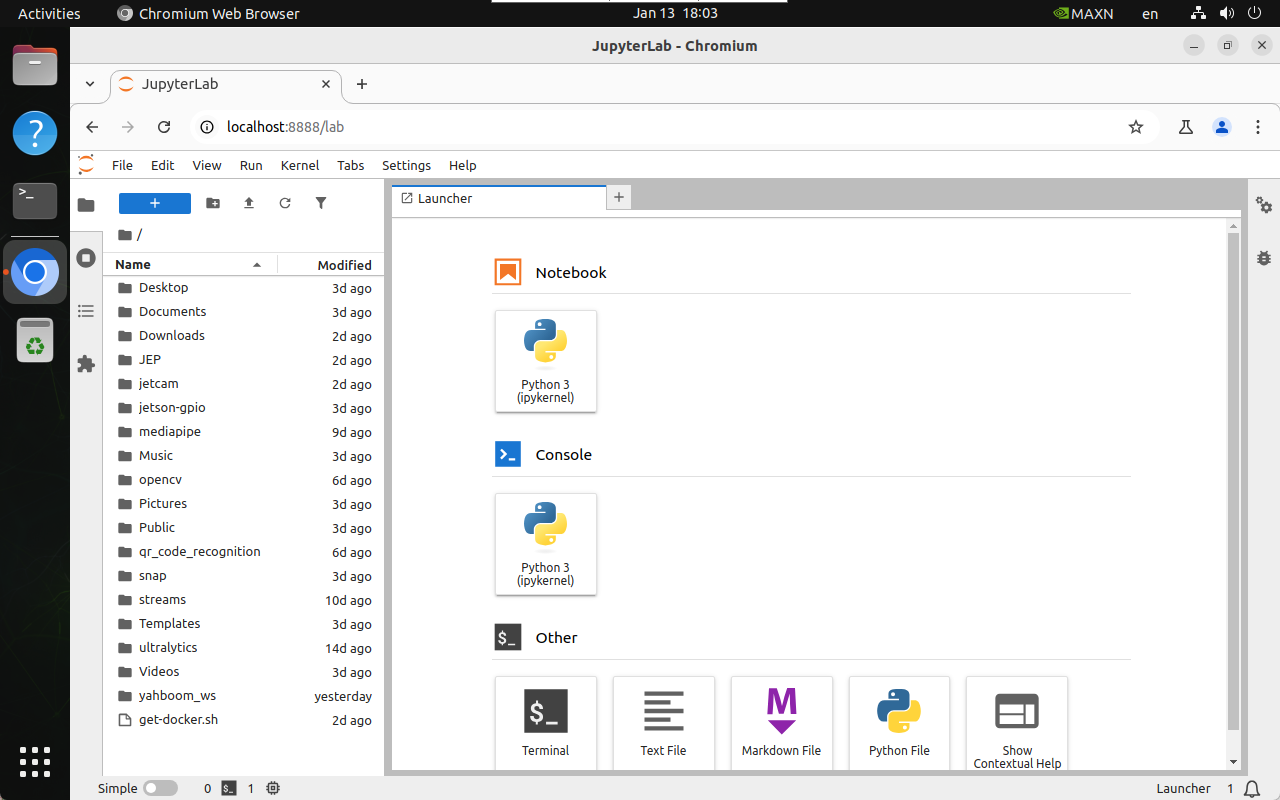
宿主机指Jetson主板系统访问,直接通过http://localhost:8888/访问:
xxxxxxxxxx http://localhost:8888/
3、Jupyter Lab配置
对Jupyter Lab配置局域网访问、访问密码、开机自启等操作。
3.1、局域网访问
设置处于同一局域网的设备可以在浏览器输入IP:8888,进行访问!
注意:校园网的局域网一般无法访问,可以更换笔记本/手机热点测试
xxxxxxxxxx 例如主板IP:192.168.2.114;我们可以通过同一局域网下的浏览器输入192.168.2.114:8888进行主板的Jupyter Lab
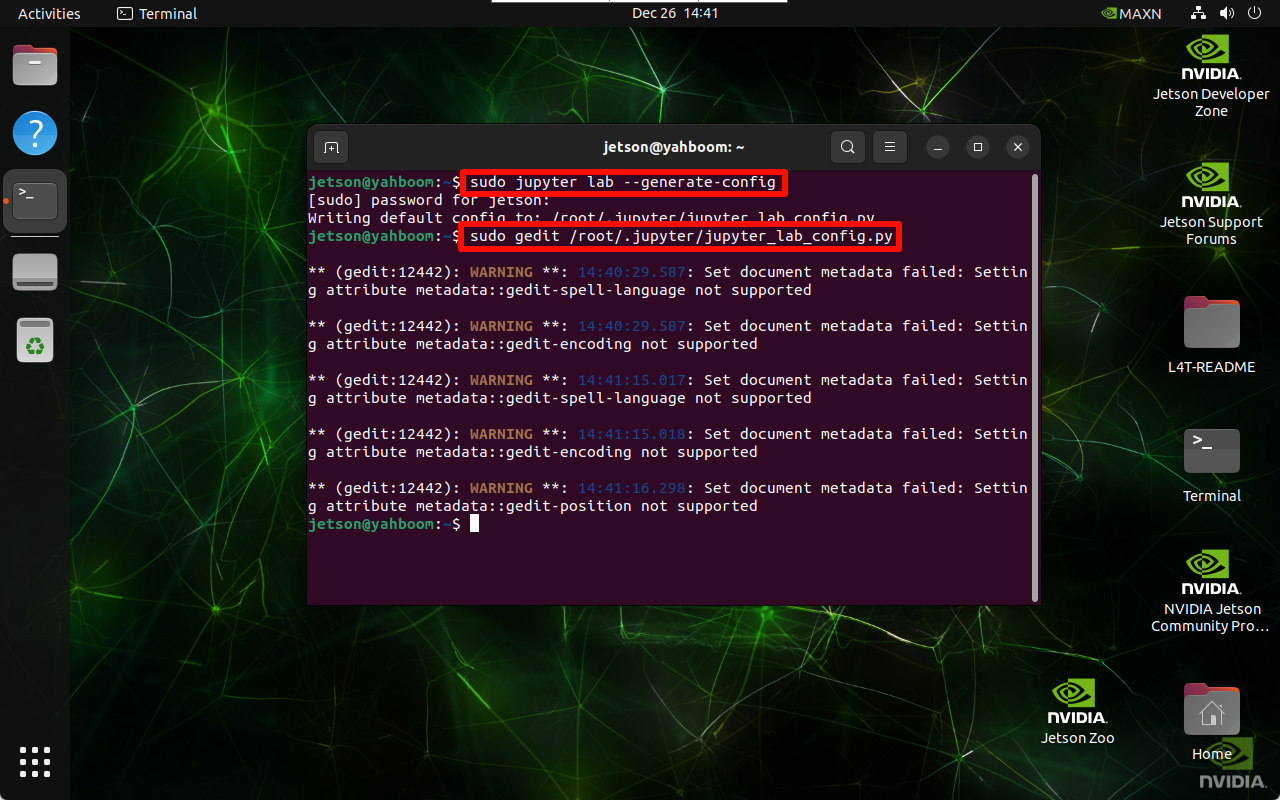
3.1.1、创建配置文件
xxxxxxxxxx sudo jupyter lab --generate-config
自动生成的配置文件位置:Writing default config to: /root/.jupyter/jupyter_lab_config.py
3.1.2、修改配置文件
xxxxxxxxxx sudo gedit /root/.jupyter/jupyter_lab_config.py
修改内容:修改后点击保存并关闭文件
xxxxxxxxxx # 允许任何来源的请求访问Jupyter Lab服务器 c.ServerApp.allow_origin = '*' # 0.0.0.0表示绑定所有可用的网络接口,允许从任何地址访问 c.ServerApp.ip = '0.0.0.0' # 允许以root用户身份启动Jupyter Lab服务器 c.ServerApp.allow_root = True # 修改默认端口,避免冲突 c.ServerApp.port = 8888
3.2、配置访问密码
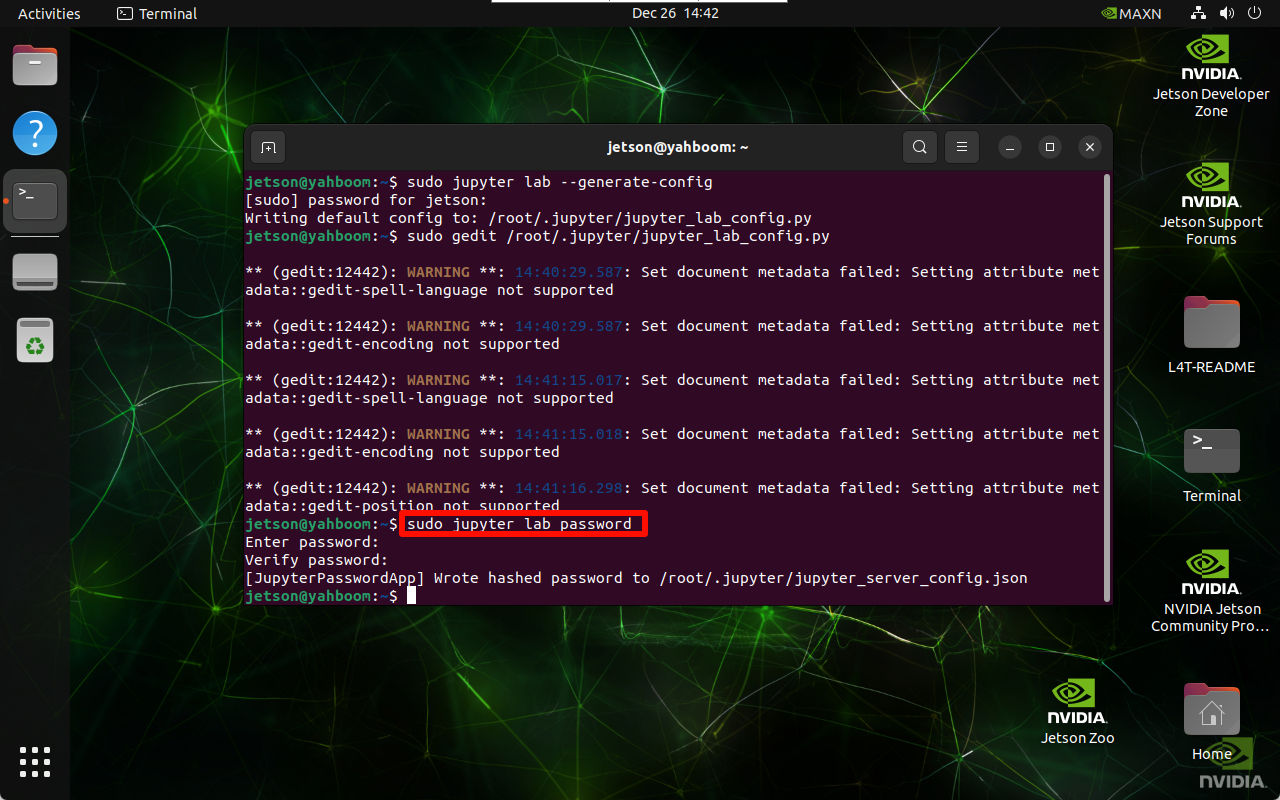
终端输入设置密码的命令,需要输入两次,输入密码不会显示输入的内容!
xxxxxxxxxx sudo jupyter lab password
自动生成的配置文件位置:[JupyterPasswordApp] Wrote hashed password to /root/.jupyter/jupyter_server_config.json
3.3、开机自启服务
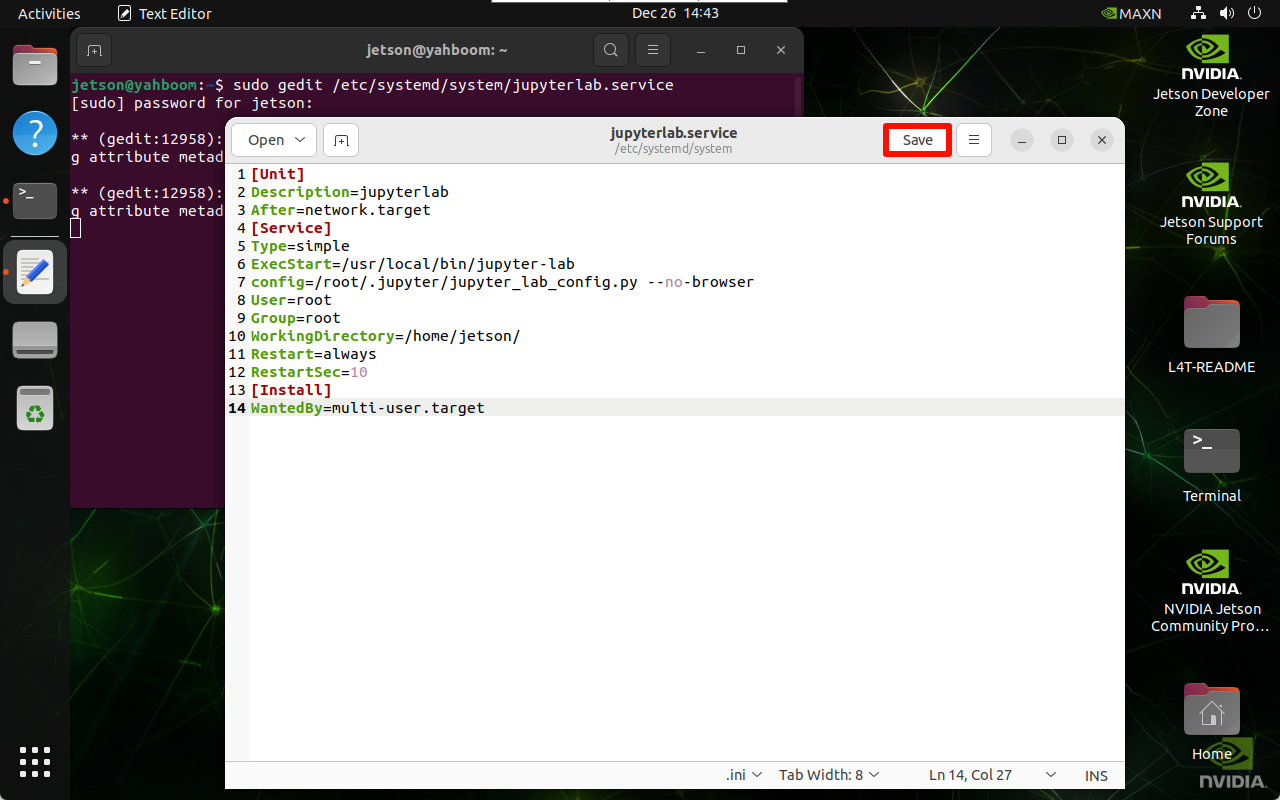
3.3.1、编辑服务文件
xxxxxxxxxx sudo gedit /etc/systemd/system/jupyterlab.service
添加内容:添加后点击保存并关闭文件
xxxxxxxxxx [Unit] Description=jupyterlab After=network.target [Service] Type=simple ExecStart=/usr/local/bin/jupyter-lab config=/root/.jupyter/jupyter_lab_config.py --no-browser User=root Group=root WorkingDirectory=/home/jetson/ Restart=always RestartSec=10 [Install] WantedBy=multi-user.target
root:系统的用户名
ExecStart:启动Jupyter lab的命令,修改成JupyterLab的安装路径
config:修改成JupyterLab的配置文件路径
WorkingDirectory:启动Jupyter-lab打开的工作目录,可自行更改(推荐修改成用户目录)
xxxxxxxxxx 查看Jupyter-lab安装路径:which jupyter-lab 配置文件路径:参考上面生成配置文件的路径
3.3.2、设置自启服务
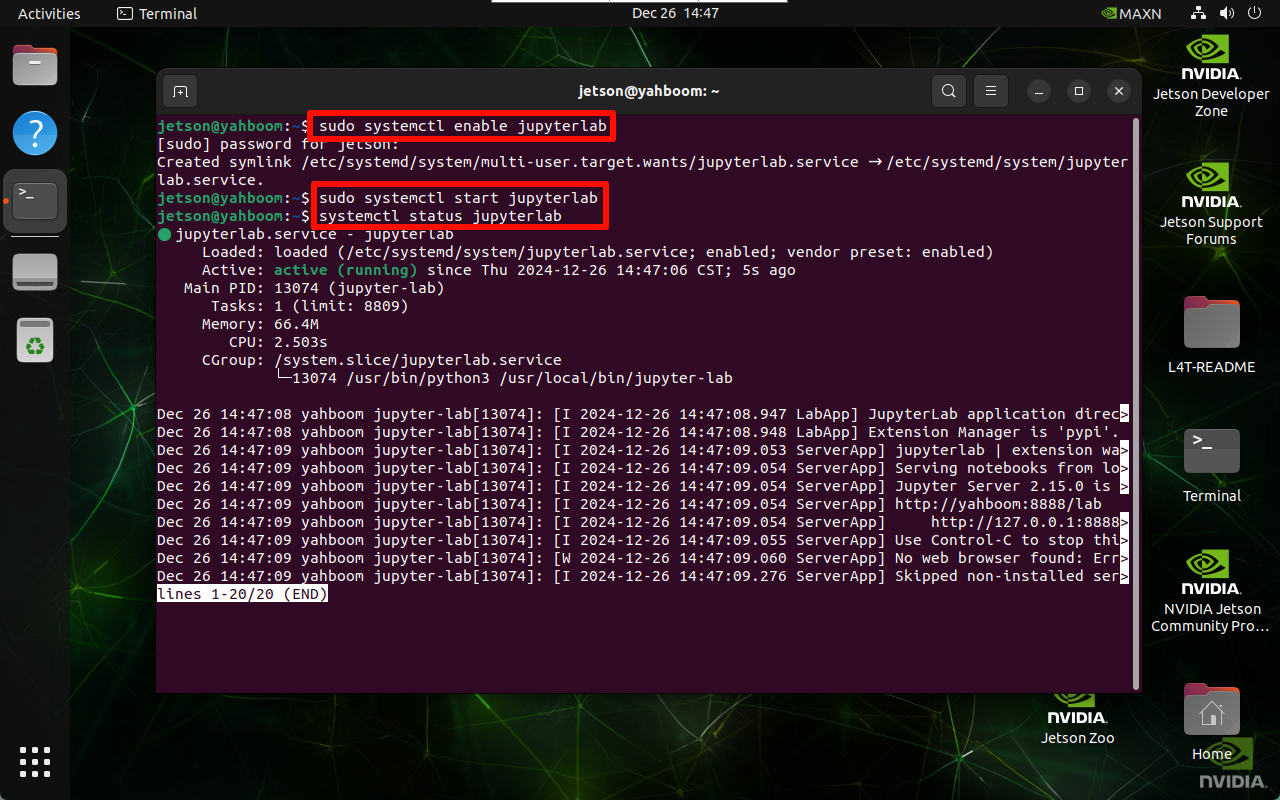
开机自启服务
xxxxxxxxxx sudo systemctl enable jupyterlab # 关闭开机自启 systemctl disable jupyterlab
启动服务
xxxxxxxxxx sudo systemctl start jupyterlab # 停止服务 sudo systemctl stop jupyterlab
查看服务状态
xxxxxxxxxx systemctl status jupyterlab
验证开机自启
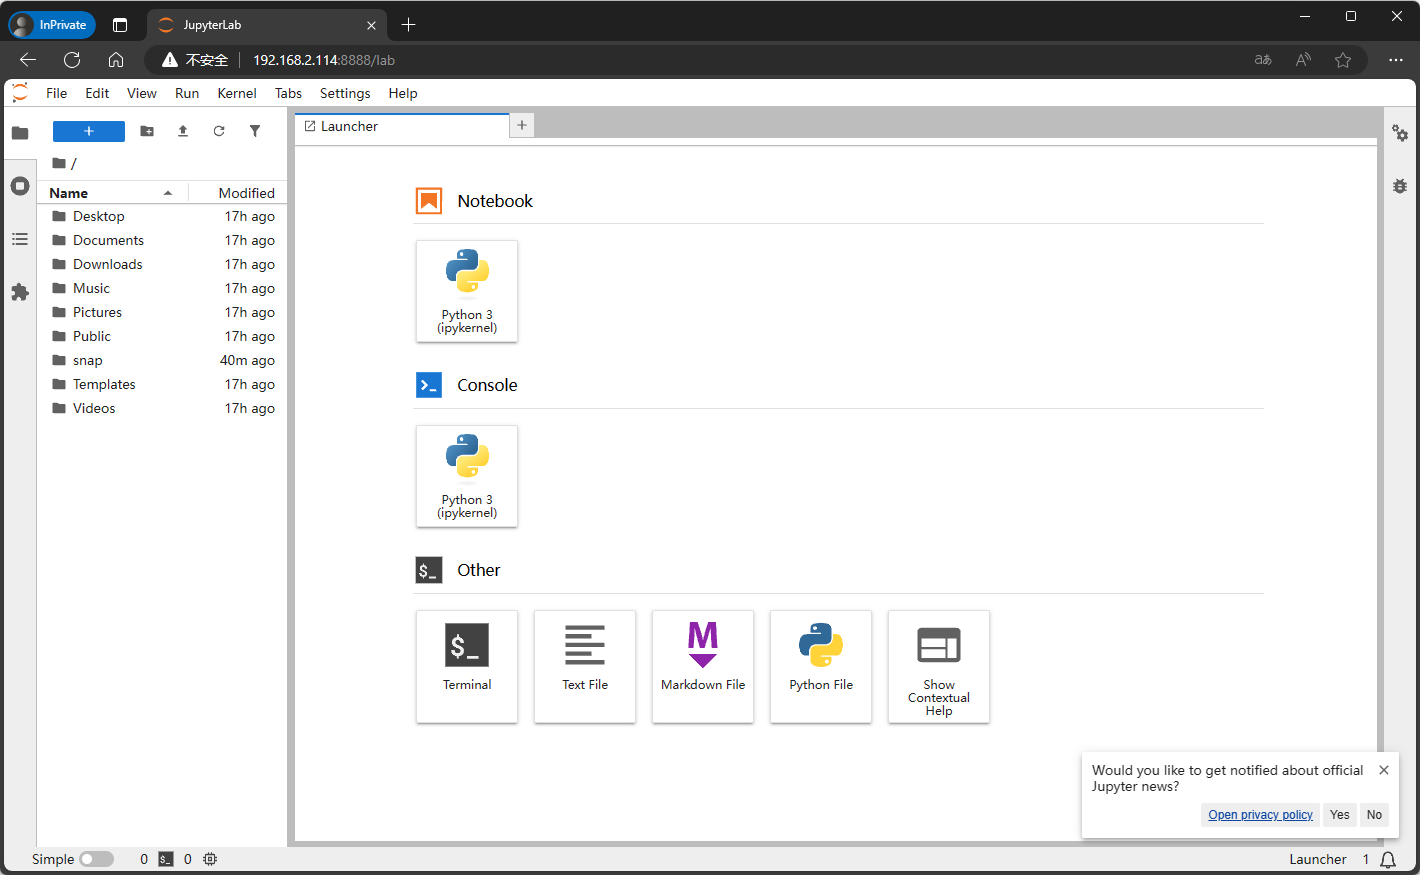
重启系统后,根据系统IP,使用同一局域网的设备访问主板IP:8888。
xxxxxxxxxx 首次访问需要输入密码,密码是前面步骤设置的信息; 截图时主板的IP是192.168.2.114,所以同一局域网下的设备可以访问192.168.2.114:8888
4、Jupyter Lab使用
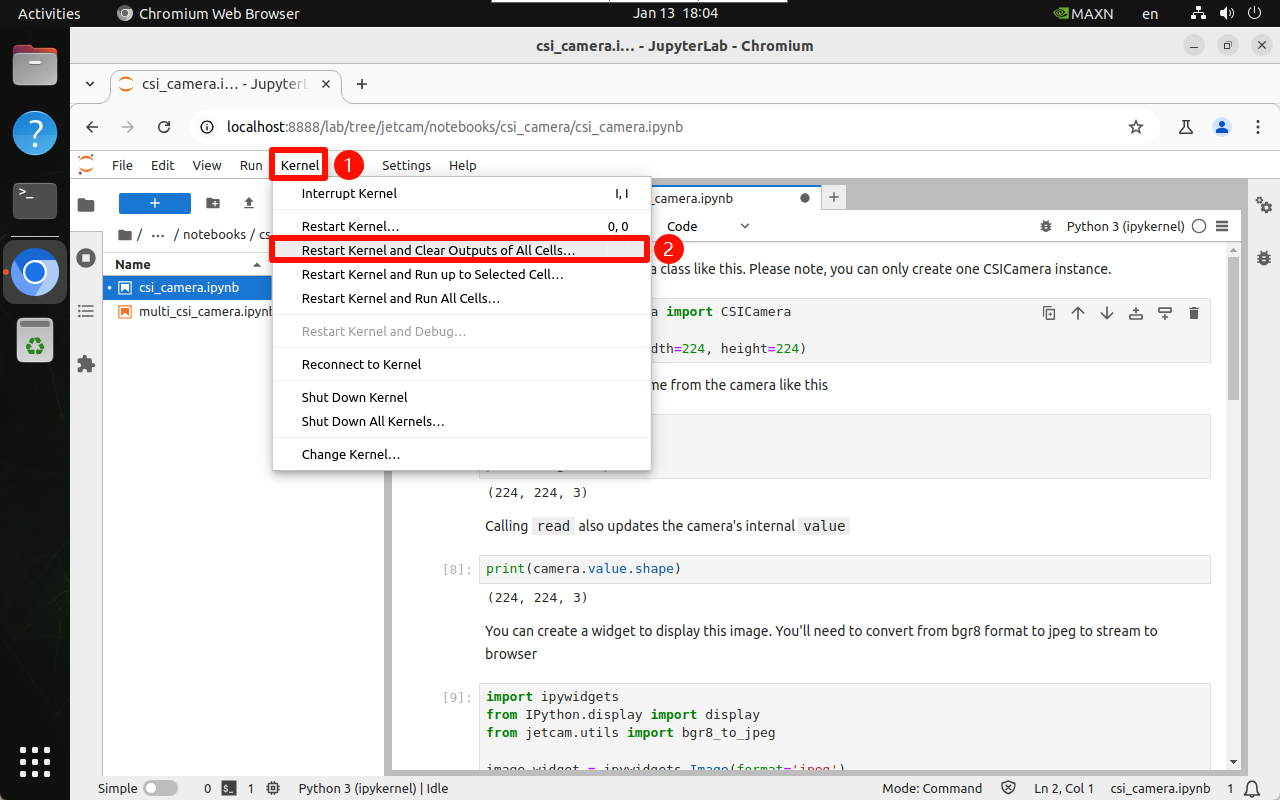
4.1、内核
建议每次运行程序或者程序异常时,重启内核和清除所有单元块输出信息:
4.2、运行程序
通过Jupyter Lab打开需要运行的程序文件,运行程序从上往下依次运行单元块:
4.2.1、正在运行
单元块左上方显示[*]代表正在运行: 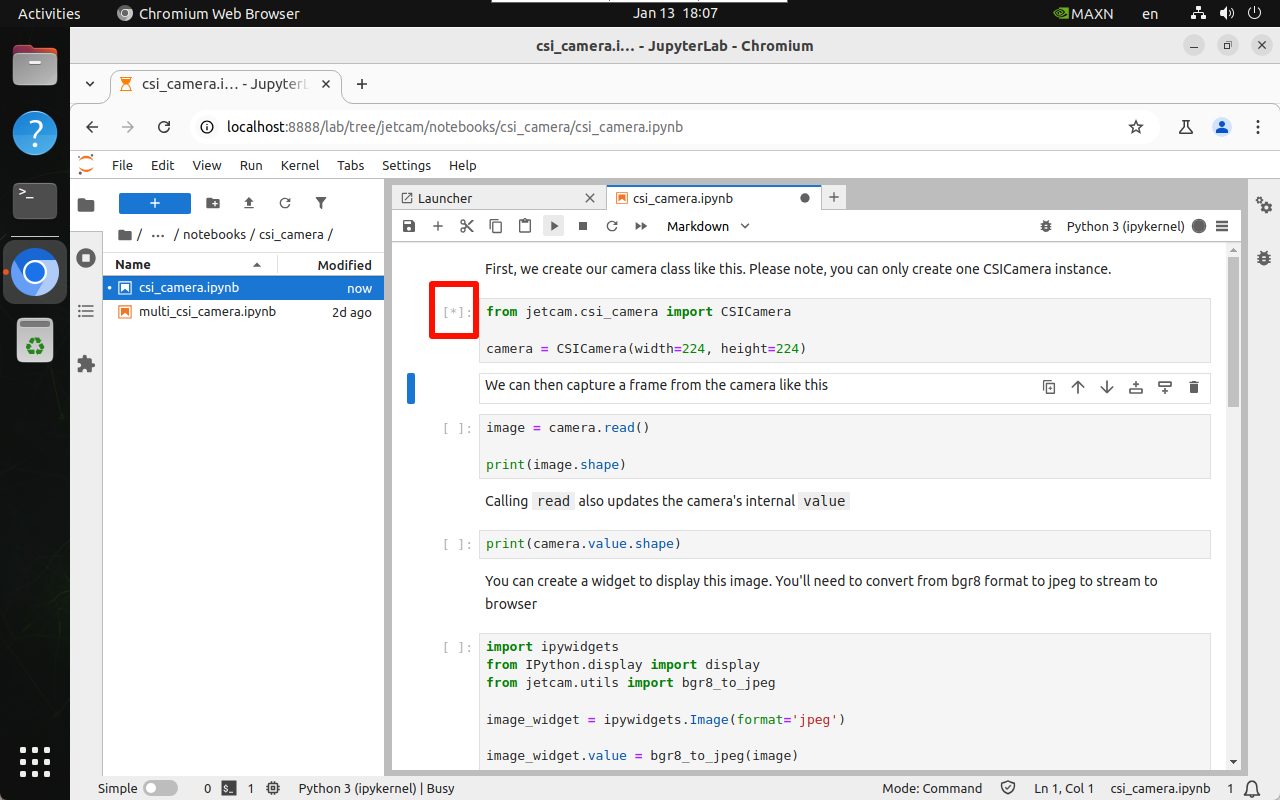
4.2.2、运行完成
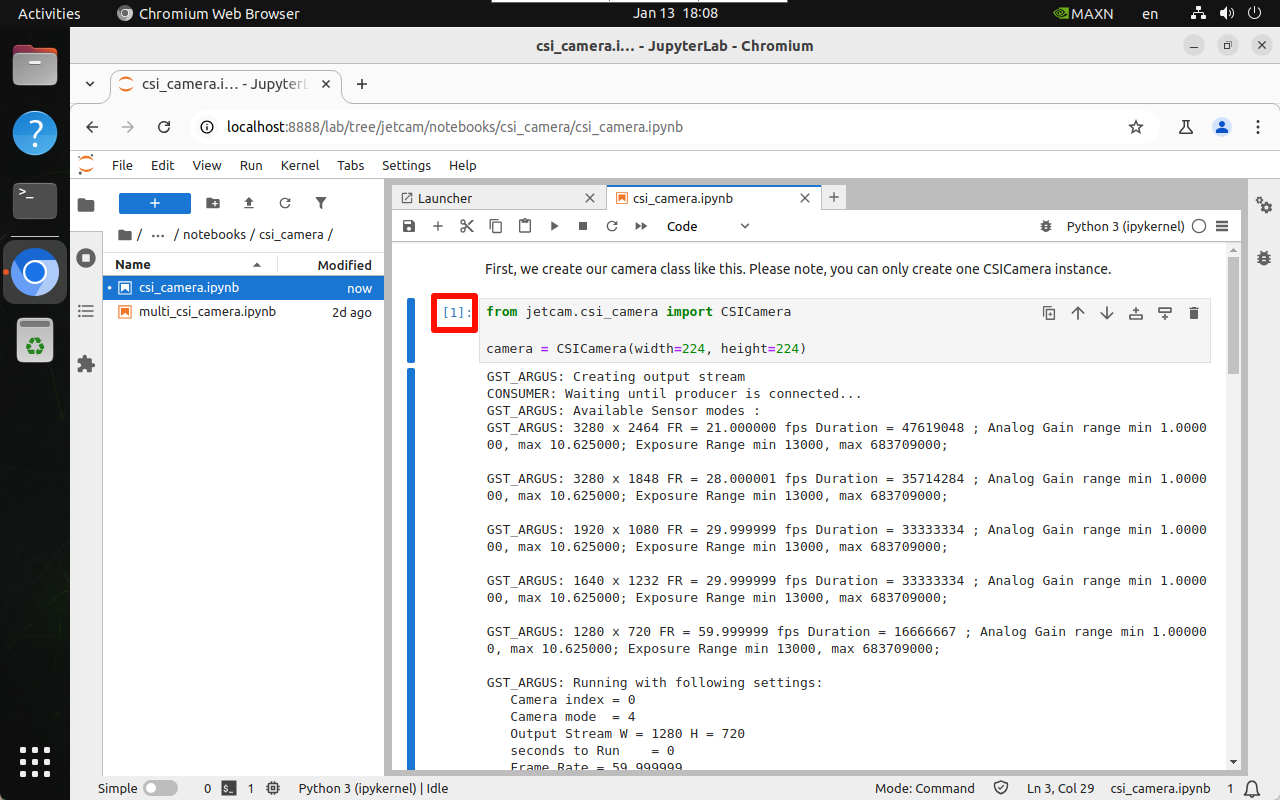
单元块左上方显示[数字]代表运行的顺序次数:例如[1] → 程序在第一次运行了该单元块代码